For a Christmas village in a small room, choose one surface, measure its usable depth, and arrange the houses before adding trees or snow. A narrow console suits a single street; a bookshelf suits short rows on separate shelves; a tray suits a display that needs to move. Check the furniture’s load limit and each building’s base, roof overhang, and power connection before choosing a layout.
Christmas Village Display Ideas for Small Spaces
Last updated:
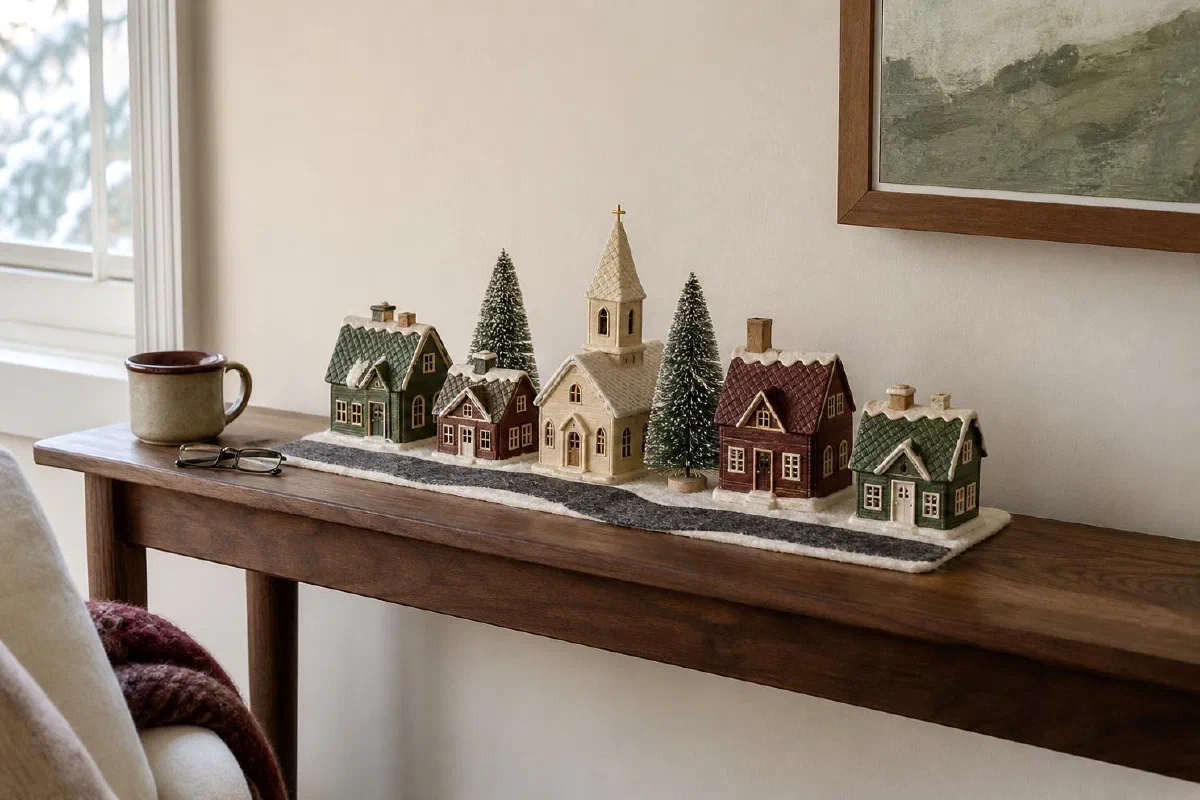
Illustrative scene, not a photograph of the linked products.
Use fewer houses if the display crowds a door, window, or everyday work surface. The unused buildings can wait for another year.
Choose a layout that fits the furniture
These are layout options, not standard dimensions or load ratings. Measure the surface you actually have, including the space taken by plugs and cords.
| Layout | Best use | Check before setting it up |
|---|---|---|
| One street on a console | A shallow surface with a clear view from the room | Door swing, roof overhang, cord route |
| Separate bookshelf rows | Several small groups without taking another table | Shelf load limit and access to books |
| A windowsill scene | A dry, sufficiently deep sill | Window operation, condensation, nearby heat |
| A tiered stand | A small group at different heights | Stability, tier depth, combined load |
| Under the tree | Low buildings on a separate level base | Watering access, gifts, walking route |
| A lift-off tray | A table that must return to daily use | Loaded tray weight and secure carrying |
| A picture ledge | A very shallow display using small pieces | Installed shelf rating and full base support |
1. Make one street on a console
A single row of houses is easier to fit than a deep town square. Start with the largest building and work outward, leaving enough room to reach its switch or remove it without knocking over its neighbors.
Place taller buildings where they will not obscure smaller ones. A short gap in the row can become a street or square; it does not need another purchase. Use a few trees at the ends to soften the outline.
Keep every base fully supported. If a roof projects beyond the furniture, check whether someone passing can catch it with a sleeve or bag. Move the whole row back or use a deeper surface. The front edge is also a poor place for loose figures in a busy entry.
2. Divide the village across bookshelf shelves
Separate shelves let a collection form several small scenes. Try a shop row on one shelf and two houses with trees on another. Leave some shelves for books so the furniture still serves its everyday purpose.
Check the furniture manufacturer’s shelf load limit, including the books and decorations already there. A riser also needs a stable base and enough depth to support the building on top. Do not assume a cardboard box or a lightweight display stand can carry a heavy ceramic house.
Route cords where they remain visible and accessible, away from sharp edges and moving doors. Follow the building’s lighting instructions rather than hiding every connection under snow or fabric.
3. Use a windowsill only if it stays dry
A windowsill works for a few small pieces when it is deep enough for their entire bases. Measure the deepest house, not just the trees. Leave the window usable, including any opening needed for ventilation or emergency escape.
Condensation makes some sills unsuitable for electrical decorations. A radiator, heater, or hot-air outlet below the window is another reason to choose a different surface. Do not run a cord through a window that can close on it.
For a sill without suitable power access, use unlit buildings. Their details are still visible in daylight, and a separate room lamp can light the scene in the evening.
4. Use a stable tiered stand
A tiered stand can show a few small buildings without a wide footprint. Check each tier’s depth and rated capacity, and account for the combined weight of the display. A stand designed for cosmetics or cupcakes may suit light accessories but should not be treated as furniture for ceramic houses.
Put heavier pieces lower when the stand’s instructions allow them. Keep bases away from the edge and leave room to retrieve each building. If children or pets can reach the stand or pull a cord, choose a more secure location and follow the furniture’s anchoring instructions where applicable.

5. Set a low scene under the tree
An under-tree display needs its own level, stable surface. Keep it outside the space used to water a live tree and outside the route used to reach gifts. Do not put delicate buildings directly on a soft, uneven tree skirt.
Use a few low pieces rather than filling the floor. Keep plugs, adapters, and light fittings accessible and uncovered as their instructions require. Paper, loose snow, and fabric should not conceal equipment that needs ventilation or separation from combustible material.
Test the layout from the room’s usual walking route. If someone must step over a wire or house to reach the tree, reduce the scene or move it.
6. Put a small village on a lift-off tray
A tray suits a dining table or coffee table that needs to be cleared. Fit the village inside the tray’s edges, keeping the tallest pieces low enough to see across the table when that matters.
Before moving it, turn off the lights, disconnect power, and remove loose or fragile pieces. Carrying a tray full of ceramic houses is different from carrying an empty tray; check its weight limit and handles. For a heavy collection, move the buildings individually.
Store the tray on another stable surface while the table is in use. Keep it away from candles, food spills, and places where a child can pull it down.

7. Choose small pieces for a picture ledge
A picture ledge is best considered for light accessories or very small buildings whose entire bases fit. Check the installed shelf’s capacity and mounting instructions. Its front lip does not make an oversized house safe.
Measure the usable depth behind that lip. Account for the power fitting at the back of a lit building, too. If the house needs to lean or hang over the edge, it belongs on a deeper shelf.
A row of trees and unlit miniature houses may be enough for a shallow ledge. Keep small removable parts beyond young children’s reach.
Three optional supplies to compare
Arrange the houses you own first. These listings serve different jobs; they are not a Budget, Best, and Splurge ladder. Dimensions, quantities, and compatibility matter more than adding accessories.
- Aredpoook clear three-tier acrylic riser (opens Amazon in a new tab)As an Amazon Associate, we earn from qualifying purchases. Full disclosure.: an option for small, light display accessories. The listing gives an overall footprint of 11.8 by 8.5 inches and height of 5.9 inches. Check individual tier depth and rated load before putting any building on it; the overall footprint is not the size of each shelf.
- hatisan 30-piece bottle-brush trees, Green-A selection (opens Amazon in a new tab)As an Amazon Associate, we earn from qualifying purchases. Full disclosure.: useful when several small scenes need trees. This is a bulk pack, so compare the selected colors and heights with your houses and buy only if you will use the quantity.
- YOEEN warm-white battery fairy lights, 24-pack (opens Amazon in a new tab)As an Amazon Associate, we earn from qualifying purchases. Full disclosure.: separate accent strands for a display where their instructions permit indoor use. This is a large pack, and the strands do not replace a village building’s specified bulb, adapter, or lighting system. Keep battery compartments secure and accessible.
Selected listings were in stock when checked on October 11, 2026. Availability and options can change; confirm the selected pack before ordering. The scene images show layout ideas, not these exact products.
Set up the display in this order
- Measure the surface, then check its load limit and any mounting requirements.
- Place unlit houses on the bare surface and test access to doors, windows, and furniture.
- Check the lighting instructions for each building. Inspect cords and fittings for damage before using them.
- Connect only compatible equipment, leaving required access and ventilation. Keep cords out of walking routes and away from places that can pinch them.
- Add trees and figures without crowding the bases or covering equipment.
- View the scene from the room’s usual seating and walking positions. Remove pieces that block sightlines or daily use.
For a sketch before unpacking, use the Christmas village layout planner. Keep the sketch to the furniture’s actual dimensions rather than fitting the furniture around a drawing.
Lighting and end-of-season care
Use the bulb or power supply specified for the particular building. Department 56’s replacement-parts guidance helps owners identify the appropriate part; it is not a reason to substitute a generic light into an unfamiliar house.
The CPSC’s holiday decoration guidance advises inspecting light sets for damaged wires or fittings and turning decorative lights off before going to bed or leaving home. Keep decorations away from flames and heat, and small removable parts out of young children’s reach. Follow current product instructions for connection limits rather than applying one limit to every type of lighting.
At the end of the season, disconnect equipment and let it cool as instructed before packing. Dust and pack each building according to its maker’s guidance. Keep compatible parts together so next year’s setup does not start with a search for the correct adapter.
More small-space holiday ideas
- Christmas Mantel Decor Ideas for a Cozy Room
- Small Home Christmas Decor and Storage Plan
- Renter friendly Christmas decor with no nails
Choose the surface that needs the fewest adjustments. A short row you can leave in place is easier to enjoy than a large scene that interferes with the room every day.