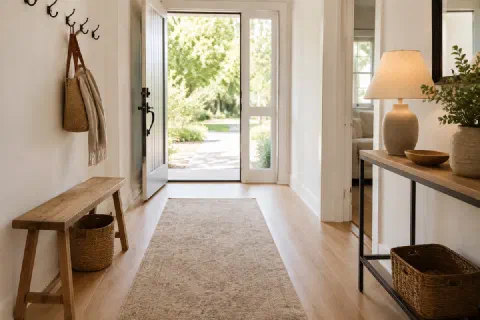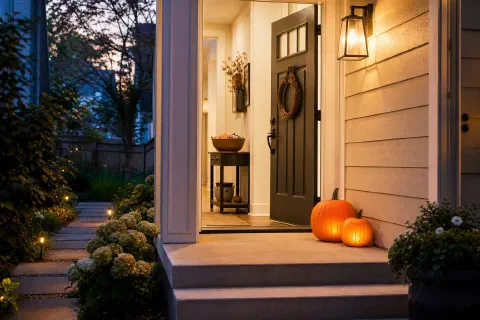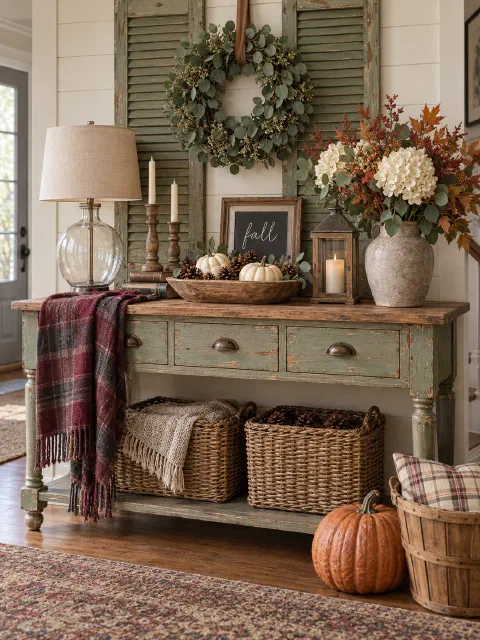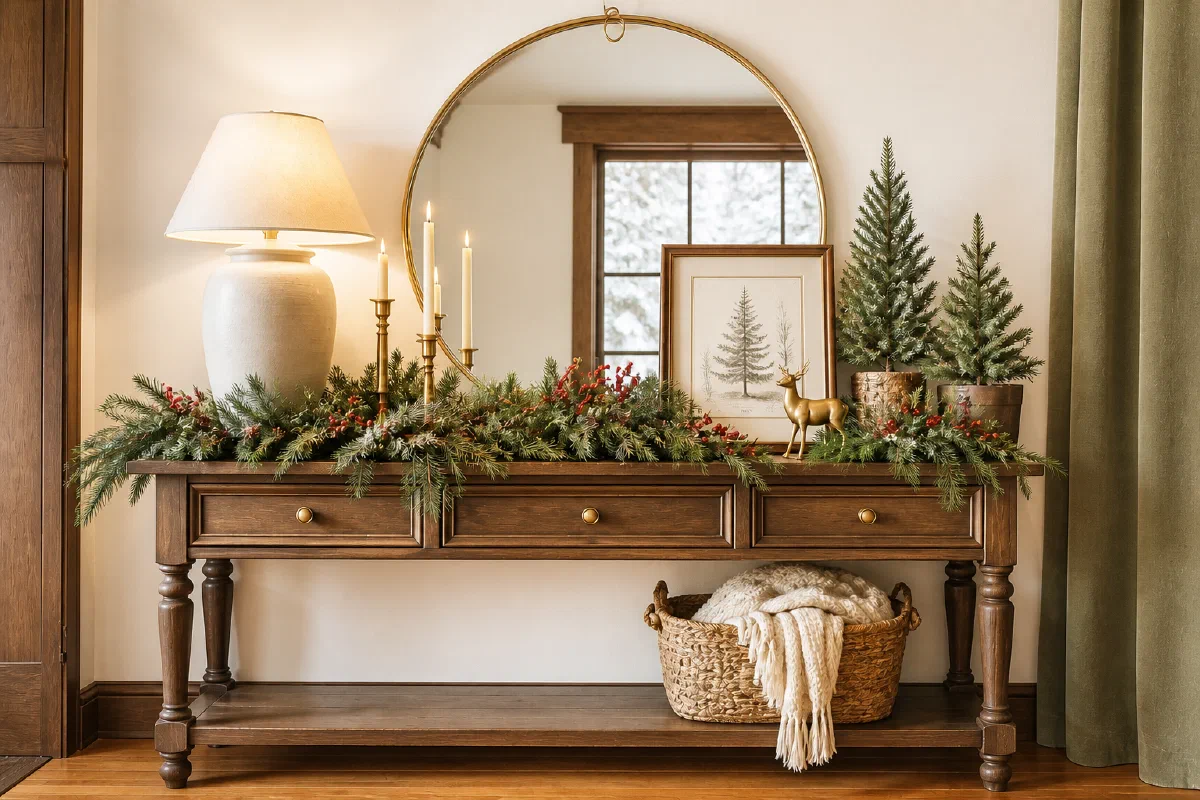
Search christmas entryway decor and you get a foyer. Wide plank floors, a staircase with garland spiraling up the banister, a nine foot ceiling, a console table you could serve dinner on.
That is not what most of us open the door into. In a small house or an apartment, the entry is a strip of floor between a door and a wall, often under 40 inches across, and there is a coat closet or a light switch on one of those walls that has to stay reachable while you are holding a bag of groceries.
The good news is that a narrow entry is decided almost entirely by one measurement, and once you have it, everything else stops being a guess.
Start With the Door Swing, Not the Console
Almost every American front door opens inward. That is the whole problem in one sentence.
A hinged door sweeps a quarter circle across your floor, and the radius of that circle is the width of the door leaf. A 36 inch door needs a clear quarter circle 36 inches deep. Run the area:
- 36 inch door: about 1,018 square inches of floor, or just over 7 square feet
- 32 inch door: about 804 square inches, or 5.6 square feet
- 30 inch door: about 707 square inches, or 4.9 square feet
Now put that against the entry you actually have. An entry 40 inches wide by 60 inches deep is 2,400 square inches. The 36 inch door eats 1,018 of them. Forty-two percent of your entry is already spoken for before you buy a single thing.
Tie a string to the hinge, mark it at the width of the door leaf, and sweep an arc across the floor in painter’s tape. Everything inside that tape is gone for December. Decorate what is left.
That five minute exercise settles most of the arguments this article would otherwise have with you. It tells you whether two potted evergreens flanking the door are possible or fantasy, whether a basket lives on the floor or does not, and whether the console goes on the hinge wall or the wall opposite.
One more thing the tape shows you. When the door is open, the leaf parks against a wall, and a spring doorstop on the baseboard holds it roughly two to three inches off. That wall can carry flat art and nothing else. No wreath, no garland with depth, no hooks. It is a wall you look at, not a wall you hang things on.
The Clearance Rules a Narrow Entry Cannot Break
Three paths have to survive December. Decorations lose to all three.
The walking path. The International Residential Code puts a floor under this: hallways shall be not less than 3 feet wide, section R311.6. Your entry is not legally a hallway, and nobody is going to cite you. Use the number anyway. Thirty six inches of clear walking width is what a person carrying a laundry basket needs, and 30 inches is the lowest I would go with hands full.
The floor in front of the door. The same code requires a landing on each side of an exterior door, not less than 36 inches measured in the direction of travel, and not narrower than the door it serves, section R311.3. Read that as a design instruction rather than a rule about your house. The people who write building codes reserve three feet of floor inside a door, and they do it because that is how much room a body needs to come through carrying something.
The accessibility standards reserve more. The US Access Board’s guide to entrances, doors and gates sets a doorway clear width of 32 inches minimum with the door open 90 degrees, and a maneuvering clearance on the pull side of a front approach that is 60 inches deep. It also says those clearances must be free of protrusions and changes in level. Those standards govern public buildings, not your apartment, but they are the best published answer to the question “how much floor does a door actually need,” and the answer is more than a decorated entry usually leaves it.
The switch and the closet. A light switch sits somewhere around 48 inches up in most American houses. Measure yours, then keep a clear reach to it in the dark with one hand full. The coat closet is the other one, and December is exactly the month it gets used most. A hinged closet door needs its own arc. A bifold folds back and projects around eight inches into the room. A bypass slider projects nothing but only ever opens half the closet, which means a coat rammed into the closed half in November is a coat you will not see until March.
Anything that blocks the switch or the closet gets moved by the second week, so do not buy it.
Which Narrow Console Table Depth Actually Fits
Here is the piece nobody prints. The console table in the photograph is 16 to 18 inches deep, because the entry in the photograph is eight feet wide. Put that table in a 40 inch entry and you have 22 inches of walking width left, which is less than the width of most people’s shoulders plus a coat.
Work it as subtraction. Entry width minus console depth equals the clear walking width you are left with.
| Entry width, wall to wall | Deepest surface that works | Clear width left | What that means |
|---|---|---|---|
| 36 in | 4 in picture ledge | 32 in | No console. A wall shelf is the surface |
| 40 in | 10 in | 30 in | The floor minimum. Nothing else stands on the floor |
| 44 in | 12 in | 32 in | Console plus a boot tray tucked under it |
| 48 in | 12 in | 36 in | Meets the 3 foot hallway figure with the console in |
| 54 in | 16 in | 38 in | A real console, and a basket on the floor |
| 60 in | 18 in | 42 in | The entry the photographs are shot in |
Two rules that fall out of the table. Ten to twelve inches is the working depth for a narrow entry, not sixteen to eighteen. And the console has to sit entirely outside the tape arc you swept on the floor, or it will be the thing the door hits.
Depths that are published rather than guessed, from what is actually selling:
- The SONGMICS narrow console with three fabric drawers (opens Amazon in a new tab)As an Amazon Associate, we earn from qualifying purchases. Full disclosure. lists 38.9 by 11.8 by 31 inches, which is the shape this whole article is about.
- The HOOBRO 29.5 inch narrow console table (opens Amazon in a new tab)As an Amazon Associate, we earn from qualifying purchases. Full disclosure. is the open shelf version, which matters in a dark entry because open shelves do not visually close the wall off.
- The HOOBRO 29.5 inch console with two fabric drawers (opens Amazon in a new tab)As an Amazon Associate, we earn from qualifying purchases. Full disclosure. is the same footprint with the clutter hidden.
- When even ten inches is too much, the Homleke skinny side table (opens Amazon in a new tab)As an Amazon Associate, we earn from qualifying purchases. Full disclosure. publishes 7.1 inches deep by 16.9 wide by 23.6 high. It is not a console. It is a place to put a lamp and a bowl of keys, which in a 36 inch entry is the entire brief.
Renters, note what is not on that list: anything mounted. A freestanding narrow console table leaves nothing behind. A wall mounted floating shelf is lovely and it is four holes.

What Goes on the Door Itself
The inside face of your front door is the one surface in a narrow entry that costs no floor. It also swings twenty times a day, so everything on it is a weight and a depth question. The outside face is a different problem with different hardware, and it has its own guide in christmas front door decor.
1. A second wreath, sized down. The outside wreath is read from the sidewalk. The inside one is read from three feet away, so it can be much smaller. Fourteen to sixteen inches on a 36 inch door looks deliberate where a 24 inch wreath indoors looks like storage.
2. A flat vertical swag instead of a round wreath. If the door parks against a wall, a round wreath is the thing that gets crushed. A vertical swag of greenery hung from the top rail lies flatter and takes the swing.
3. A ribbon drop. Two lengths of wide velvet or plaid ribbon from the top of the door to about knee height, nothing else. Zero depth, no hardware, and it reads as decoration from the living room.
4. Bells on the knob. A leather strap of brass bells is two or three inches deep and makes the door announce people, which in December is half the point. Check it clears the strike plate.
5. Nothing at all. If the door swings against a wall with a doorstop two inches off it, the honest answer is that the door is not a surface this year. Spend that budget on the wall opposite, which you look at every time you come in anyway.
Whatever goes on, close the door on it before you commit. If the latch does not click, it comes off.
What Goes on the Wall
The wall is where a narrow entry actually gets decorated, because the wall is the surface you have the most of and the one nobody is walking through.
6. Outline the door frame in garland. A 36 by 80 inch door frame has a perimeter of 196 inches, which is 16 feet 4 inches. Add about a fifth for the drape and you are buying 20 feet. DearHouse faux eucalyptus garland (opens Amazon in a new tab)As an Amazon Associate, we earn from qualifying purchases. Full disclosure. comes as two 6 foot lengths, so two packs covers a door frame with slack.
7. Swag the header only. Cheaper and often better in a narrow entry. One 6 foot length across a 36 inch header gives you 18 inches of tail hanging down each side, which frames the door without crowding it.
8. Buy the greenery by the foot when you are covering more than one surface. The CQURE eucalyptus garland (opens Amazon in a new tab)As an Amazon Associate, we earn from qualifying purchases. Full disclosure. is twelve 7 foot lengths, 84 feet in the box. That is the door frame, the mirror, the shelf and the closet door out of one order.
9. Swap the art you already own. Same frame, same nail, a winter print for six weeks. It costs nothing, leaves no marks, and it changes the wall more than anything you can hang beside it.
10. A picture ledge instead of a console. Three to four inches deep at around 50 inches up. It holds candles, cards and a small garland while giving back every inch of floor. In a 36 inch entry this is the surface.
11. A mirror with greenery across the top edge. Two jobs at once. A narrow entry with no window is dark, and a mirror doubles whatever light the fixture gives you. Lay a short garland along the top and it becomes the December version of itself.
12. A peg rail with greenery woven through it. If you already have a rail for coats, thread a length of garland behind the pegs. The coats still work, the rail is now decoration, and you have added nothing.
13. A lit vine curtain on a blank wall. The JMEXSUSS vine curtain lights (opens Amazon in a new tab)As an Amazon Associate, we earn from qualifying purchases. Full disclosure. run 200 LEDs on artificial ivy across roughly 6.5 by 6.5 feet, USB powered with a remote. What it does well is fill a blank wall with light in a space too narrow for a lamp.
For hanging any of it without holes, the adhesive strip tiers 3M publishes are 1, 3, 5 and 8 pounds, and the step everyone skips is weighing the thing first. The full weight discussion is in renter friendly christmas decor; the short version is that a garland with pinecones in it is heavier than it looks and a strip does not fail politely.

What Goes on a Narrow Console or a Floating Shelf
Ten inches of depth is a real constraint, and it is why most console styling advice does not transfer. You cannot layer front to back. You layer side to side and up.
14. Three heights, left to right. Something tall at one end, something medium in the middle, something low and wide at the other. On a 30 inch top that is a small lamp or a 12 inch tree, a cluster of candles, and a shallow tray. Three objects, not seven.
15. Put the whole thing on a tray. A narrow console is also the drop zone, and in December it will be needed as a surface with no notice. If the decoration lives on one tray it lifts off in a single motion and goes back the same way.
16. Battery tea lights, and the twelve inch rule if you use real ones. The US Fire Administration’s holiday guidance is blunt about it: keep candles at least 12 inches away from anything that burns, put them in stable holders where they cannot be knocked down, and consider battery operated flameless candles instead. On a ten inch deep shelf with garland on it, a twelve inch clearance is arithmetically impossible. Battery tea lights are not the timid choice here, they are the only one that fits.
17. A tabletop tree rather than a floor tree. A 12 to 18 inch tree on the console gives you the silhouette without touching the door arc. A floor tree in a 40 inch entry is a tree you will sidestep for six weeks and then resent.
18. Leave a third of the surface empty on purpose. Keys, mail and a phone still have to land somewhere. A drop zone that gets fully decorated is a drop zone that relocates to the floor, and that is the failure mode the year round version of this problem already covers in small entryway ideas without a mudroom.
19. A floating shelf at 30 to 32 inches when nothing can stand on the floor. Same height as a console, none of the legs. Renters, this is four anchors and a patch, so weigh it against the picture ledge, which is smaller and lighter and often enough.
What Goes on the Floor
The floor is the surface you have least of. Be ruthless.
20. Two small potted evergreens flanking the door, only if the tape says yes. They are the best looking thing on this list and they are the first casualty of a 36 inch door. If they sit inside the arc, they are out.
21. A basket in the dead triangle behind the hinge. Every inward opening door leaves a wedge of floor on the hinge side that the leaf never sweeps. It is usually the only floor a narrow entry has to spare. A basket of rolled throws lives there and nothing else does.
22. Lanterns belong on the console, not the floor. A floor lantern in a 40 inch entry is a shin. Raise it or skip it.
23. Accept that in December the floor decoration is the boot tray. That is not a compromise. A tray of wet boots with a folded plaid throw over the console above it looks like a house someone lives in, which is more than the foyer photographs manage.
What Goes on the Back of the Door
The inside face of the door is also the only free vertical storage a narrow entry has, and in December it is under real pressure. You get decoration or you get storage on that panel. Usually storage wins.
24. An over the door hook rack for the daily coat load. Over the door hardware needs the gap at the top of the door, and on a weatherstripped exterior door that gap is tight. Hang it, then close the door and listen for the latch.
25. An over the door mirror. In a dark entry it does the same light bouncing job as a wall mirror and costs no wall.
26. An over the door organizer for the December overflow. Hats, gloves, scarves, and the gift bags that otherwise live on the console you just decorated.
27. Guests’ coats do not go here. Six visitors’ coats will not fit in a narrow entry on any system. Put them on a bed in the back room and stop trying. The entry holds the coats of the people who live there, and that is the whole job.
What Goes Overhead
Above about 78 inches, nothing is in anyone’s way. It is the most underused space in a narrow entry.
28. Hang the header swag high. On an 80 inch door, hooks at 82 to 84 inches put the garland above every head that comes through.
29. A kissing ball at 78 to 80 inches. High enough that people walk under it, low enough that it reads. Hang it where the door does not swing into it, which usually means over the middle of the entry rather than in the doorway.
30. Change the bulb before you add a light. A narrow entry with one cold ceiling fixture is a narrow entry that looks like a corridor. A warm white bulb in the fixture you already have does more for the room than any decoration on this page, and it takes two minutes.
31. A ceiling hook in the dead space above the door. A bundle of eucalyptus or a small bunch of greenery hung from a single hook fills the volume nothing else can use. Renters, a ceiling hook is a hole in a ceiling, which is harder to explain at move out than a hole in a wall. An adhesive ceiling hook rated well above the weight, put up on a warm day, is the version that does not cost you.

If the Entry Is Under About 36 Inches
Below roughly 36 inches wall to wall, skip the console at any depth. A ten inch console in a 33 inch hall leaves 23 inches, less than a shoulder in a coat. The hall gets decorated in two bands instead: below 27 inches off the floor and above 80.
The US Access Board’s rule on protruding objects lets anything with its leading edge between 27 and 80 inches project four inches along a path of travel, and anything below 27 or above 80 project any amount. It does not govern a rental, but the arithmetic holds, and in a very narrow hall the number should be smaller. Keep everything between the two lines to about two inches deep.
- Tape the bands. Painter’s tape at 27 inches and at 80. Flat garland, a slim frame or a print goes between them; everything deeper goes above the top line or below the bottom one.
- Reach 80 inches without a ladder. A three step ladder needs more floor than a 33 inch hall has. Press an adhesive hook onto the end of a broom handle and place it from flat feet, which adds the eight inches of reach from 78 to 86.
- Anchor a swag at both ends. A swag pulls sideways, which drywall will not take for six weeks, so hang it from a ceiling hook at each end or anchor it into the casing.
- Keep the floor strip empty. A twelve inch basket takes a third of a 33 inch hall. If something lives on the floor, keep it under 27 inches, such as a shallow lidded box or the boot mat. A standard runner is about 26 inches wide and leaves three inches bare on each side, so it runs wall to wall or not at all.
- Move the boot tray into the coat closet. The hall floor is the path.
How to Keep the Wet Boot Tray Layer Working
An entry in December is where the wet stuff lands. A decorated entry with nowhere to put a soaked boot fails around the third of the month, and then the decoration gets blamed for being in the way.
Run the numbers before you buy the tray. A pair of adult boots side by side takes roughly 10 inches across by 12 inches deep. A common 30 by 15 inch boot tray therefore holds three pairs, which is one household of three on a snowy Tuesday and nothing more. A household of four in December generates more pairs than any tray sold will hold, so the tray is for today’s boots and the rest go in the closet.
Two mats, not one, and they do different jobs.
Outside, something coarse that scrapes. The Barnyard Designs coir doormat (opens Amazon in a new tab)As an Amazon Associate, we earn from qualifying purchases. Full disclosure. is 30 by 48 inches with a rug grip backing. Coir is stiff and it takes the grit off before it reaches your floor.
Inside, something washable that absorbs. A buffalo plaid washable layering rug (opens Amazon in a new tab)As an Amazon Associate, we earn from qualifying purchases. Full disclosure. at 27.5 by 43 inches does the job. The same shape in a coffee and white colorway (opens Amazon in a new tab)As an Amazon Associate, we earn from qualifying purchases. Full disclosure. works if black and white is too sharp against your floor.
Then the measurement that decides which mat goes where. A coir mat is typically over half an inch thick, and an inward swinging door usually has less clearance than that at the threshold. Slide a tape measure under your closed door before you order anything. If the gap is smaller than the mat, the coir goes outside and only a low pile washable rug goes inside. A mat that stops the door is a mat that gets kicked into the corner by New Year’s.
One more thing about the tray. Buy one with a raised lip, because melted snow from four boots is a real volume of water and a flat mat just moves it to the edges. And keep the tray outside the door arc, which by now you have in painter’s tape on the floor.
The Order to Put It Up In
An evening, in this sequence. Doing it in this order is what stops you buying twice.
- Sweep the arc in painter’s tape. String on the hinge, marked at the width of the door leaf. Leave the tape down until everything is placed.
- Measure the entry wall to wall, then subtract for the console using the table above. Write the number down before you shop.
- Check the switch and the closet. Open the closet fully. Reach the switch in the dark. Note what is in the way now, before you add anything.
- Measure the gap under the door for the mat, and the gap at the top for over the door hardware.
- Set the floor layer first. Boot tray, inside rug, and the basket in the hinge triangle if there is room. Floor decides proportion for everything above it.
- Then the surface. Console or ledge, styled left to right in three heights, one third of the top left empty.
- Then the wall and the header. Garland outline or header swag, mirror, art swap. Weigh anything on adhesive before it goes up.
- Then the door and overhead. Inside wreath or swag, bells, kissing ball. Close the door and confirm the latch still clicks.
- Swap the bulb to warm white and turn everything on at dusk. A narrow entry looks completely different lit than it does at noon, and that is when you will see what is missing.
- Walk through it carrying something. Groceries in both hands, coat on. Whatever you hit is the thing that comes back down tonight rather than in January.
Questions People Actually Ask
How to decorate your entryway for Christmas?
Work in the order of what costs you floor. The wall and the overhead cost nothing, so they carry the most: a garland outlining or swagging the door frame, a mirror or a picture ledge, a warm bulb in the fixture. The door itself costs nothing either, so a small wreath or a flat swag goes there if the door does not park against a wall. A narrow console at 10 to 12 inches deep is the first thing that costs you walking width, so it earns its place only if the entry is 40 inches or wider. The floor goes last and usually holds a boot tray and nothing else. Sweep the door arc in painter’s tape first and let it veto anything that lands inside it.
How to decorate inside doorways for Christmas?
Frame the opening rather than filling it. A 36 by 80 inch door frame has a perimeter of about 16 feet 4 inches, so 20 feet of garland outlines it with drape to spare, and one 6 foot length swags the header alone. Hang it at 82 to 84 inches so nobody walks into it. Keep the depth flat, because anything projecting more than a couple of inches into a doorway gets caught by a shoulder or a coat sleeve. For an interior doorway with no door in it, a full outline works. For a doorway with a door that swings, decorate the header and the wall above it and leave the jambs alone.
How do I beautify my front entrance?
Light, then a mirror, then one good surface. A narrow entry usually has one cold overhead fixture and no window, and swapping that bulb to warm white changes the room more than anything you can buy. A mirror on the long wall doubles that light and makes 40 inches read wider than it is. Then one surface at the right depth, styled with three things instead of ten. After that it is upkeep rather than decorating: a clear floor, a working drop zone, and the boots contained. The year round version of this is in small entryway ideas without a mudroom, and none of it is seasonal.
What are some easy and simple Christmas decor ideas?
The four that take under ten minutes each and leave no trace. Swap the art in the frame you already own for a winter print. Lay a short eucalyptus garland along the top of the mirror you already have. Put three battery tea lights on a tray on whatever surface exists. Change the bulb to warm white. That is a decorated entry for the cost of one garland, and every step of it reverses in January without a tool.
What are some ideas for Christmas decor for my front door?
The outside face is a different set of problems: wreath diameter against door width, which hanger matches steel versus fiberglass versus a storm door, and what wind does to any of it. All of that is covered properly in christmas front door decor, including the sizing rule of door width minus 12 inches. The one thing to carry back inside is this: whatever hangs on the outside adds weight and depth to a panel that also has to close, and if you are using an over the door hanger it takes up the same gap your inside hooks want.
What to put on the front door in January?
Take the red off and leave the green. A plain evergreen or eucalyptus wreath with the ribbon and the berries removed reads as winter rather than Christmas, and it will hold until the light comes back in February. Inside, the same swap works: pull the ornaments off the console, keep the greenery and the candles, and add texture instead of color. That whole transition, and how to stop a room feeling bare the week the tree leaves, is the subject of winter home decor.
What I’d Actually Buy
Product details can change; check the listing before you buy.
- HOOBRO 29.5 inch narrow console table (opens Amazon in a new tab)As an Amazon Associate, we earn from qualifying purchases. Full disclosure.. The open shelf version, which keeps a dark entry from closing in.
- HOOBRO 29.5 inch console with two fabric drawers (opens Amazon in a new tab)As an Amazon Associate, we earn from qualifying purchases. Full disclosure., when the drop zone needs the clutter hidden.
- SONGMICS console with three fabric drawers (opens Amazon in a new tab)As an Amazon Associate, we earn from qualifying purchases. Full disclosure.. It publishes 38.9 by 11.8 by 31 inches, which is the depth this article keeps pointing at.
- Homleke skinny side table, 7.1 inches deep (opens Amazon in a new tab)As an Amazon Associate, we earn from qualifying purchases. Full disclosure.. For the entry where even ten inches is too much.
- Barnyard Designs coir doormat, 30 by 48 inches (opens Amazon in a new tab)As an Amazon Associate, we earn from qualifying purchases. Full disclosure.. The outside layer, the one that scrapes.
- Buffalo plaid washable layering rug, 27.5 by 43 inches (opens Amazon in a new tab)As an Amazon Associate, we earn from qualifying purchases. Full disclosure.. The inside layer, and the one that goes in the machine in January.
- The same rug in coffee and white (opens Amazon in a new tab)As an Amazon Associate, we earn from qualifying purchases. Full disclosure., if black and white is too hard against your floor.
- DearHouse faux eucalyptus garland, two 6 foot lengths (opens Amazon in a new tab)As an Amazon Associate, we earn from qualifying purchases. Full disclosure.. Two packs outlines a standard door frame.
- CQURE eucalyptus garland, twelve lengths totalling 84 feet (opens Amazon in a new tab)As an Amazon Associate, we earn from qualifying purchases. Full disclosure., when you are covering the frame, the mirror and the shelf in one go.
- JMEXSUSS vine curtain lights, 200 LED (opens Amazon in a new tab)As an Amazon Associate, we earn from qualifying purchases. Full disclosure.. Listed because a lit wall is the one move that works in an entry with no room for a lamp.
No boot tray link. The searches I ran did not surface one I would stand behind, and a tray with a raised lip is a thing you can judge in a store aisle better than I can judge it from a listing.
What to Read Next
- Small entryway ideas without a mudroom is the year round version of this space, and the drop zone it sets up is what December has to work around.
- Christmas front door decor covers the outside face of the same door: wreath sizing, hangers by door material, and storm doors.
- Renter friendly christmas decor with no nails has the full adhesive weight numbers and what a lease can actually say about a hallway.
- Small home christmas decor storage plan is what to do in January so next December takes an evening instead of a weekend.
- Winter home decor is where the entry goes once the red comes down and there are still ten weeks of dark left.