The easiest balcony-light plan starts with four measurements: railing length, distance to an outdoor outlet, nearest door swing, and the width of the walking path. Those numbers decide how much light you need and which power route will not leave a cord where someone steps.
For most small balconies, one warm-white run along the rail and one lit corner are enough. Use equipment rated for outdoor use, keep every attachment inside the railing line, and tie both ends of anything wind can lift.
Choose battery, solar, or plug-in power first
| Power route | Best use | Main limit |
|---|---|---|
| Battery | Wreaths, lanterns, short accents | Cold shortens useful battery life |
| Solar | Unshaded south- or west-facing rail | December shade and cloudy weather reduce runtime |
| Plug-in | Long, steady light runs | Requires an outdoor-rated, GFCI-protected outlet and safe cord route |
If there isn’t an outdoor outlet, do not run a cord through a closing door. Use battery fairy lights (opens Amazon in a new tab)As an Amazon Associate, we earn from qualifying purchases. Full disclosure., solar lights with a USB backup charging option (opens Amazon in a new tab)As an Amazon Associate, we earn from qualifying purchases. Full disclosure., or a short USB strand (opens Amazon in a new tab)As an Amazon Associate, we earn from qualifying purchases. Full disclosure. powered safely from an accessible pack.
UL Solutions explains that decorative light strings are evaluated to UL 588. The U.S. Fire Administration recommends checking light strands for damage, following manufacturer limits for connected strands, and turning holiday lights off before leaving home or going to bed.
1. Keep the battery pack inside the railing

Battery lights suit a wreath, lantern, planter, or short rail section. Secure the pack at hand height on the inside of the railing, sheltered from standing water and reachable while wearing a coat.
Use the built-in timer if available, as on this 17-foot battery star strand (opens Amazon in a new tab)As an Amazon Associate, we earn from qualifying purchases. Full disclosure.. It limits weather exposure and prevents the small daily job of opening the door to switch the lights off.
2. Read the outdoor label and connect limit

Choose a strand clearly marked for outdoor or indoor-outdoor use, such as this 33-foot plug-in fairy strand (opens Amazon in a new tab)As an Amazon Associate, we earn from qualifying purchases. Full disclosure.. Read the manufacturer’s maximum connected-strand number instead of estimating from wattage alone.
If an outdoor outlet is available, test its GFCI buttons and keep the plug connection under a weatherproof cover. Replace any strand with cracked insulation, loose sockets, or a damaged plug.
3. Drop one strand into a weighted planter

Anchor the top inside the rail and run the lower end into a planter weighted with gravel or a paving stone. This creates a vertical line without hanging anything outside the building.
Keep the cable against the wall or rail with adhesive cable clips (opens Amazon in a new tab)As an Amazon Associate, we earn from qualifying purchases. Full disclosure. so it cannot loop across the floor. The planter must be heavy enough to stay put in wind.
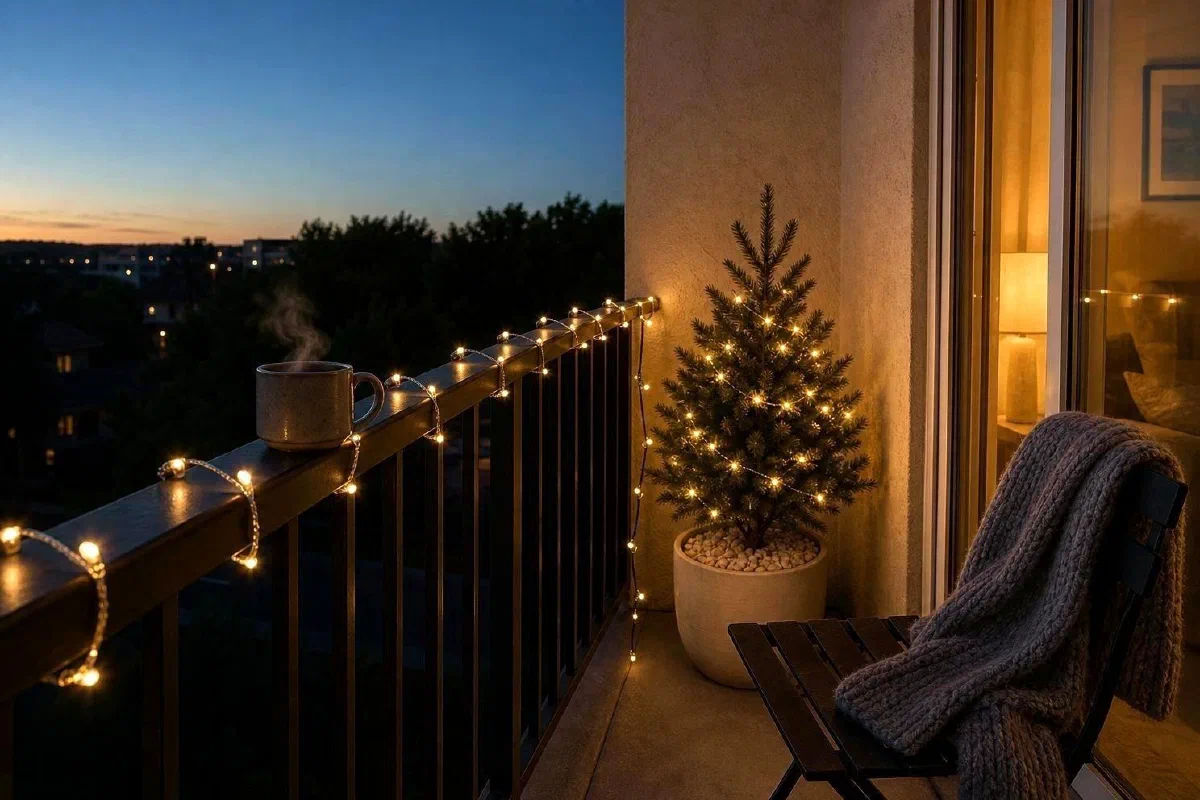
4. Spiral lights around a tube railing

Wrap the strand loosely around the top rail with even spacing. A 27-foot solar strand (opens Amazon in a new tab)As an Amazon Associate, we earn from qualifying purchases. Full disclosure. covers most small-balcony top rails. Secure both ends and add soft reusable ties where a corner changes direction.
Do not cinch a tie hard enough to press into the wire jacket. Keep all lights and fasteners on the balcony side of the railing.
5. Frame the sliding door with outdoor light clips

Apply outdoor-rated light clips (opens Amazon in a new tab)As an Amazon Associate, we earn from qualifying purchases. Full disclosure. to a clean, dry surface within the product’s temperature instructions. Install them on a mild day and allow the adhesive to set before adding the strand.
Keep clips, wire, and decorations outside the door track and away from the latch. The sliding panel should open fully without brushing the lights.
6. Coil a short strand inside a floor lantern

Use a battery strand in a weather-suitable lantern, placed against the inside wall rather than near the railing edge. The light at floor level makes a balcony feel occupied from indoors.
Choose a lantern with enough weight and a stable base. If it can tip in a gust, place it in a weighted planter or remove it before bad weather.
7. Light one potted evergreen

Wrap a short LED strand loosely through the outer branches of a small potted evergreen. Keep the battery pack outside the potting mix and check that the plant can still be watered without wetting the controls.
Use a heavy frost-safe container and keep the pot inside the railing line. A light nursery pot should sit inside a weighted cover pot before wind arrives.
A no-drill setup checklist
- Measure the railing and safe cord route.
- Confirm the light strand is rated for outdoor use.
- Choose one power route and one color temperature.
- Install clips or ties while the surface is dry.
- Keep every strand inside the railing line.
- Test the door, walking path, and timer.
- Recheck attachments after the first strong wind.
The balcony should still work as a balcony after dark. If a strand creates a trip line, blocks the slider, or hangs over the neighbor below, move it before adding more light.
What I’d Actually Buy
Product details can change; check the listing before you buy.
- Brightown battery fairy lights, 12 strands of 7 feet (opens Amazon in a new tab)As an Amazon Associate, we earn from qualifying purchases. Full disclosure.. Short strands suit a wreath, a lantern, or one small evergreen.
- Minetom 50-LED star string lights, 17 feet with a timer (opens Amazon in a new tab)As an Amazon Associate, we earn from qualifying purchases. Full disclosure.. The timer is the part that earns its place, because it saves opening the slider on a cold night.
- Minetom plug-in fairy lights, 33 feet with an adapter (opens Amazon in a new tab)As an Amazon Associate, we earn from qualifying purchases. Full disclosure. are marked for indoor or outdoor use, which is the label the second idea above asks you to read.
- Minetom USB twinkle lights, 33 feet with a remote and timer (opens Amazon in a new tab)As an Amazon Associate, we earn from qualifying purchases. Full disclosure.. This is the one for a balcony where the only power is a pack or a USB port inside the door.
- Command outdoor light clips, 20 clips with weather-resistant strips (opens Amazon in a new tab)As an Amazon Associate, we earn from qualifying purchases. Full disclosure.. Damage-free removal is the whole point on a rental balcony.
- XHF clear adhesive cable clips, 60 pack (opens Amazon in a new tab)As an Amazon Associate, we earn from qualifying purchases. Full disclosure.. They keep a cord flat against the wall instead of looped across the floor.
- addlon solar string lights, 52 feet with a remote and USB charging (opens Amazon in a new tab)As an Amazon Associate, we earn from qualifying purchases. Full disclosure.. The USB charging is the backup for a shaded December rail.
- Brightech Ambience Pro solar string lights, 27 feet (opens Amazon in a new tab)As an Amazon Associate, we earn from qualifying purchases. Full disclosure.. The shorter run fits a small balcony rail without a long tail of spare cable to hide.
There is no pick here for the floor lantern, the weighted cover pot, or the soft reusable ties. Nothing I looked at fit a balcony closely enough to recommend, so buy those locally.
Related balcony and holiday lighting guides
- Christmas porch decor for a small porch covers outdoor cord gauge, ladders, and a larger entry setup.
- Renter friendly Christmas decor with no nails handles the tree, attachments, and fire-safety questions inside the slider.
- String-light patio ideas without a pergola gives year-round support options when there is no overhead beam.
- Fall balcony ideas for small apartments uses the same small-space and no-drill principles before December.